Kaga Yubinuki Supplies & Recommendations
Now that the first intro course is almost ready to go live on the website, I thought I would share some resources and recommendations for where to get supplies.
There are no affiliate links in this post. I am not being paid to recommend any of these suppliers. This is my honest advice based on availability and my personal preferences. I like to support other small businesses, and I hope you will too.
One of the great things about Kaga yubinuki is that you don’t need a lot of supplies, and you don’t need much space to work. Most of the materials you need go into making the base of the yubinuki and can be found at any craft store, but there are a few that are trickier to find, especially outside of Japan. There are also a couple of tools that aren’t strictly necessary, but will make your life significantly easier, especially as you get into more complex designs.
Readily Available
These supplies can be purchased pretty much anywhere that sells paper:
Cardstock (8.5 x 11” for US; A4 for the rest of the world)
Double-sided tape
Pilot Frixion pen (if you plan to mark your koma directly on your yubinuki base; if not, any pen or pencil will do)
It doesn’t matter if the cardstock is white, kraft paper, or colored—it will not be visible. Likewise, the double-sided tape can be any type or brand, but I would recommend getting some that is as thin as possible while also actually sticking to things. The first tape I tried did not stick to paper, let alone fabric, so make sure you don’t get one marked “removable”.
You will need to go to a craft or fabric store for these, but they should be easy to find:
Cotton, single-fold bias tape (20 mm is ideal, but if you’re in the U.S. you can substitute ¾” or 1”, you’ll just need to trim the excess)
Any sewing thread (cotton, poly, or blend—it doesn’t matter, it’s just for the base)
Thread snips (or any short-blade scissors that can cut thread)
As with the cardstock, the color of your regular thread doesn’t matter, it will be completely covered by a layer of batting, but you should choose bias tape in colors that will complement or contrast the colors you plan to use in your yubinuki. For beginners, I recommend using bias tape colors that aren’t a close match to any of your thread colors because it makes it harder to see the stitches along the top and bottom rim of the yubinuki. You can also make your own bias tape out of cotton or silk, but this requires a few extra steps and tools.
Needle
Needles get their own category because you have a choice between European needles and Japanese needles. If you’re going to use a European needle, pick one that isn’t too long, is relatively thin, and that has a small head. If you don’t already own one, you can find them at most craft stores and any fabric store. If you want to try the Japanese needles that are traditionally used for yubinuki, you are probably going to have to order one unless you are currently living in Japan.
Japanese needles have a different sizing system than European ones (cards on the table, I have no idea how European needle sizing works, I just know it isn’t the same). Packages of Japanese needles typically have two numbers written on them in kanji. The first number refers to the thickness of the needle. The higher the number, the thinner the needle. The second number refers to the length of the needle. The higher the number, the longer the needle. The needles most frequently recommended by yubinuki artists are 四ノ三 (yon-no-san), though I personally use 四ノ二 (yon-no-ni), the second-shortest needle, because I am accident-prone and have a tendency to stab myself with anything longer.
The brand most used by Kaga yubinuki artists is Meboso, an old, family-owned business based in Kanazawa. All of my needles are Meboso, but they are hard to find outside Japan unless you buy one of Cohana’s needle sets, which contains 2 Meboso needles each of four sizes: yon-no-ichi, yon-no-ni, yon-no-san, and san-no-ni. These sets can be purchased directly from the Cohana website, or from several North American based small businesses like Brooklyn Haberdashery. An alternative to Meboso that is easier to find (at least in North America) is Misuya, which is sold by KimonoMomo, Brooklyn Haberdashery, and a handful of Japan-based Etsy shops [Note: the Misuya sets sold by the two U.S. shops only has yon-no-go, yon-no-ni, san-no-go and san-no-ni.].
Washi Paper
If you’re lucky, you live somewhere with genuine art supply shops instead of two chain crafting box stores, and can just wander over and buy washi. I am not so fortunate, and have to order mine online. You’re looking for washi that is about 50-65 gsm in weight. Size is immaterial as long as you can cut a 1 cm wide strip long enough to fit around your yubinuki over the silk batting. If you’re making large quantities of yubinuki, A4 washi paper that can be used in a printer, like Onao taireishi, is an economical option and can be found on Amazon (I know, I know, but sometimes we have no choice). Theoretically, you could use standard printer paper instead of washi, but I wouldn’t recommend it. Washi is made of mulberry and is more fibrous than regular paper, making it both stronger and more flexible. Basically, it acts more like cloth than paper and is less likely to form ridges that distort the pattern as you cover its surface in thread.
Silk Batting and Thread
Now we’re getting into the “absolutely vital, but trickier to find” category of supplies. I buy most of my silk batting in Japan. The only silk batting I was able to find online when I first started making yubinuki is a package of 5 sheets made by Kinkame, the same Japanese company that makes my favorite thread, and sold by KimonoMomo in California. It retails around $7 (USD), and each sheet can make about a dozen yubinuki, so it’s a great choice for anyone learning the craft. I think it would be possible to substitute unspun silk cocoons, which can be purchased as raw fiber for spinning and felting, but I haven’t tried it and you would have to clean (or possibly boil) them before you can use them, which is not ideal for most people.

Kinkame 4-color thread cards (As you can see, I used some colors faster than others…)
The most important component of Kaga yubinuki is of course the thread itself. To make yubinuki, you need silk hand-sewing thread. There are three big brands commonly recommended by yubinuki artists: オリヅル(Orizuru), 金亀 (Kinkame), and 都羽 (Miyakobane). All three brands make vibrant, lustrous thread in over a hundred colors, but some are easier to find than others. You can find box sets of a limited color range of Orizuru from indie shops around the world selling on Etsy or their websites, and I was able to find one Japan-based Etsy shop that offers Miyakobane, but my recommendation for anyone just starting out with Kaga yubinuki is Kinkame because in addition to their regular line they sell eleven, four-color 40 meter thread cards. These mini thread sets allow you to try making yubinuki without a big financial investment, and tend to be easier to source abroad. KimonoMomo [link is for the full 11-card set, but you can also buy each card separately], Snuggly Monkey, and half a dozen other indie fiber craft shops sell them for $5-6 (USD). To make learning yubinuki budget-friendly, I limited my color palette for the Intro to Kaga yubinuki courses so that all of the patterns and variations could be made using only colors found in these sets.
Mandrel
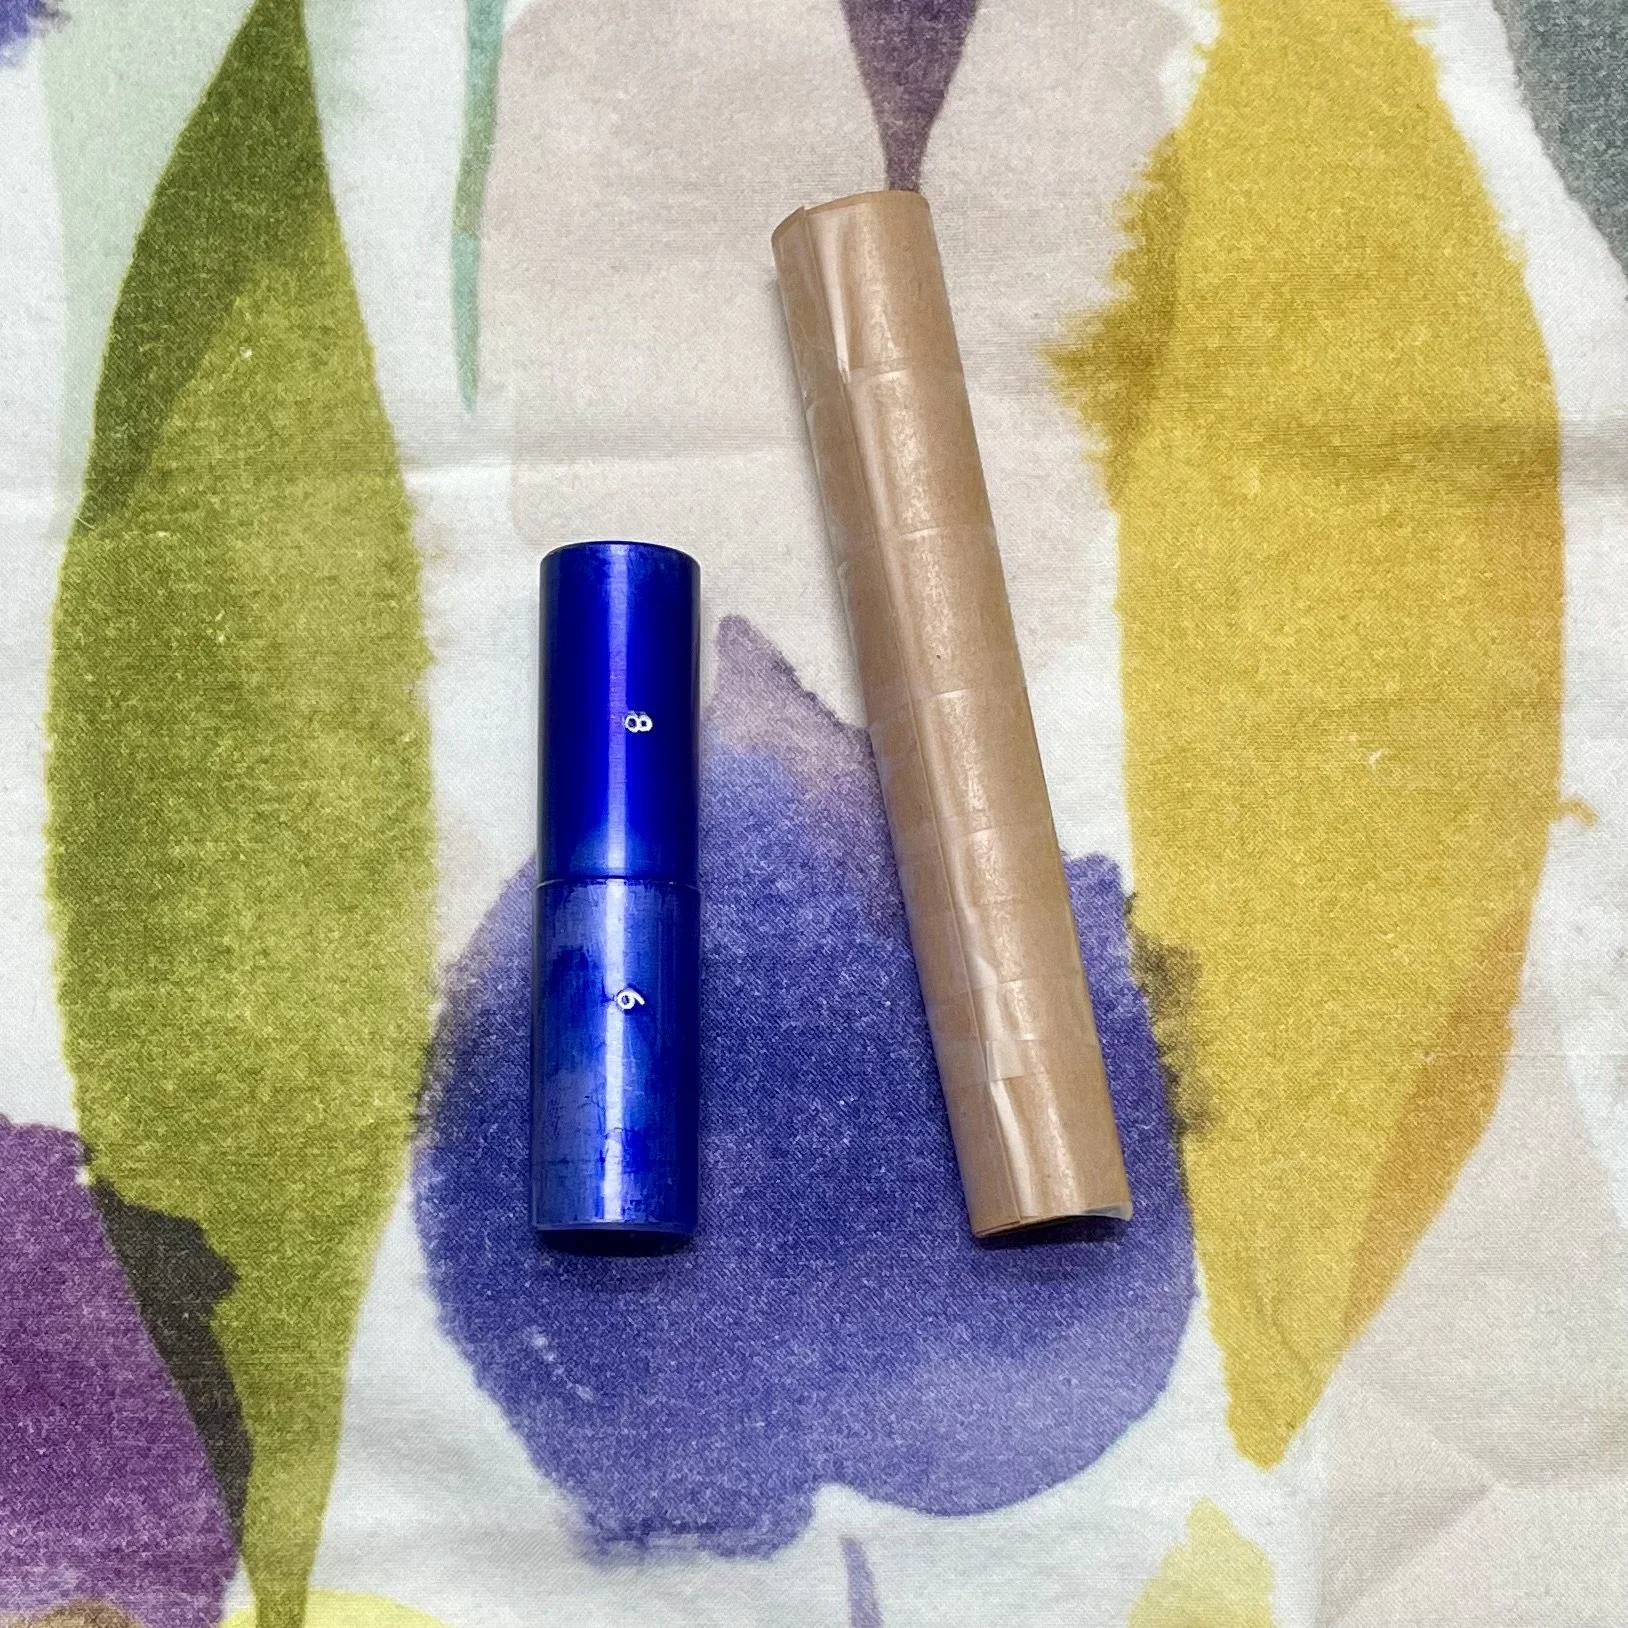
Metal ring mandrel (left) vs. homemade cardstock mandrel (right)
A mandrel is a cylindrical device typically made of metal or wood used to shape rings to a specific size. Technically, you don’t need an actual mandrel to make yubinuki—you can make one out of cardstock to the size you want quite easily—but if you’re going to be making a lot of yubinuki, I would recommend getting one because the real-deal is much sturdier than paper. There are many types of mandrels available across a broad spectrum of pricing, so poke around online and see what appeals to you. I personally use a set of metal mandrels from Cool Tools that is marketed for forming precious metal clay, but unless you’re planning to make yubinuki in a load of different sizes, you don’t need a whole set.
Not Necessary, but Nice to Have
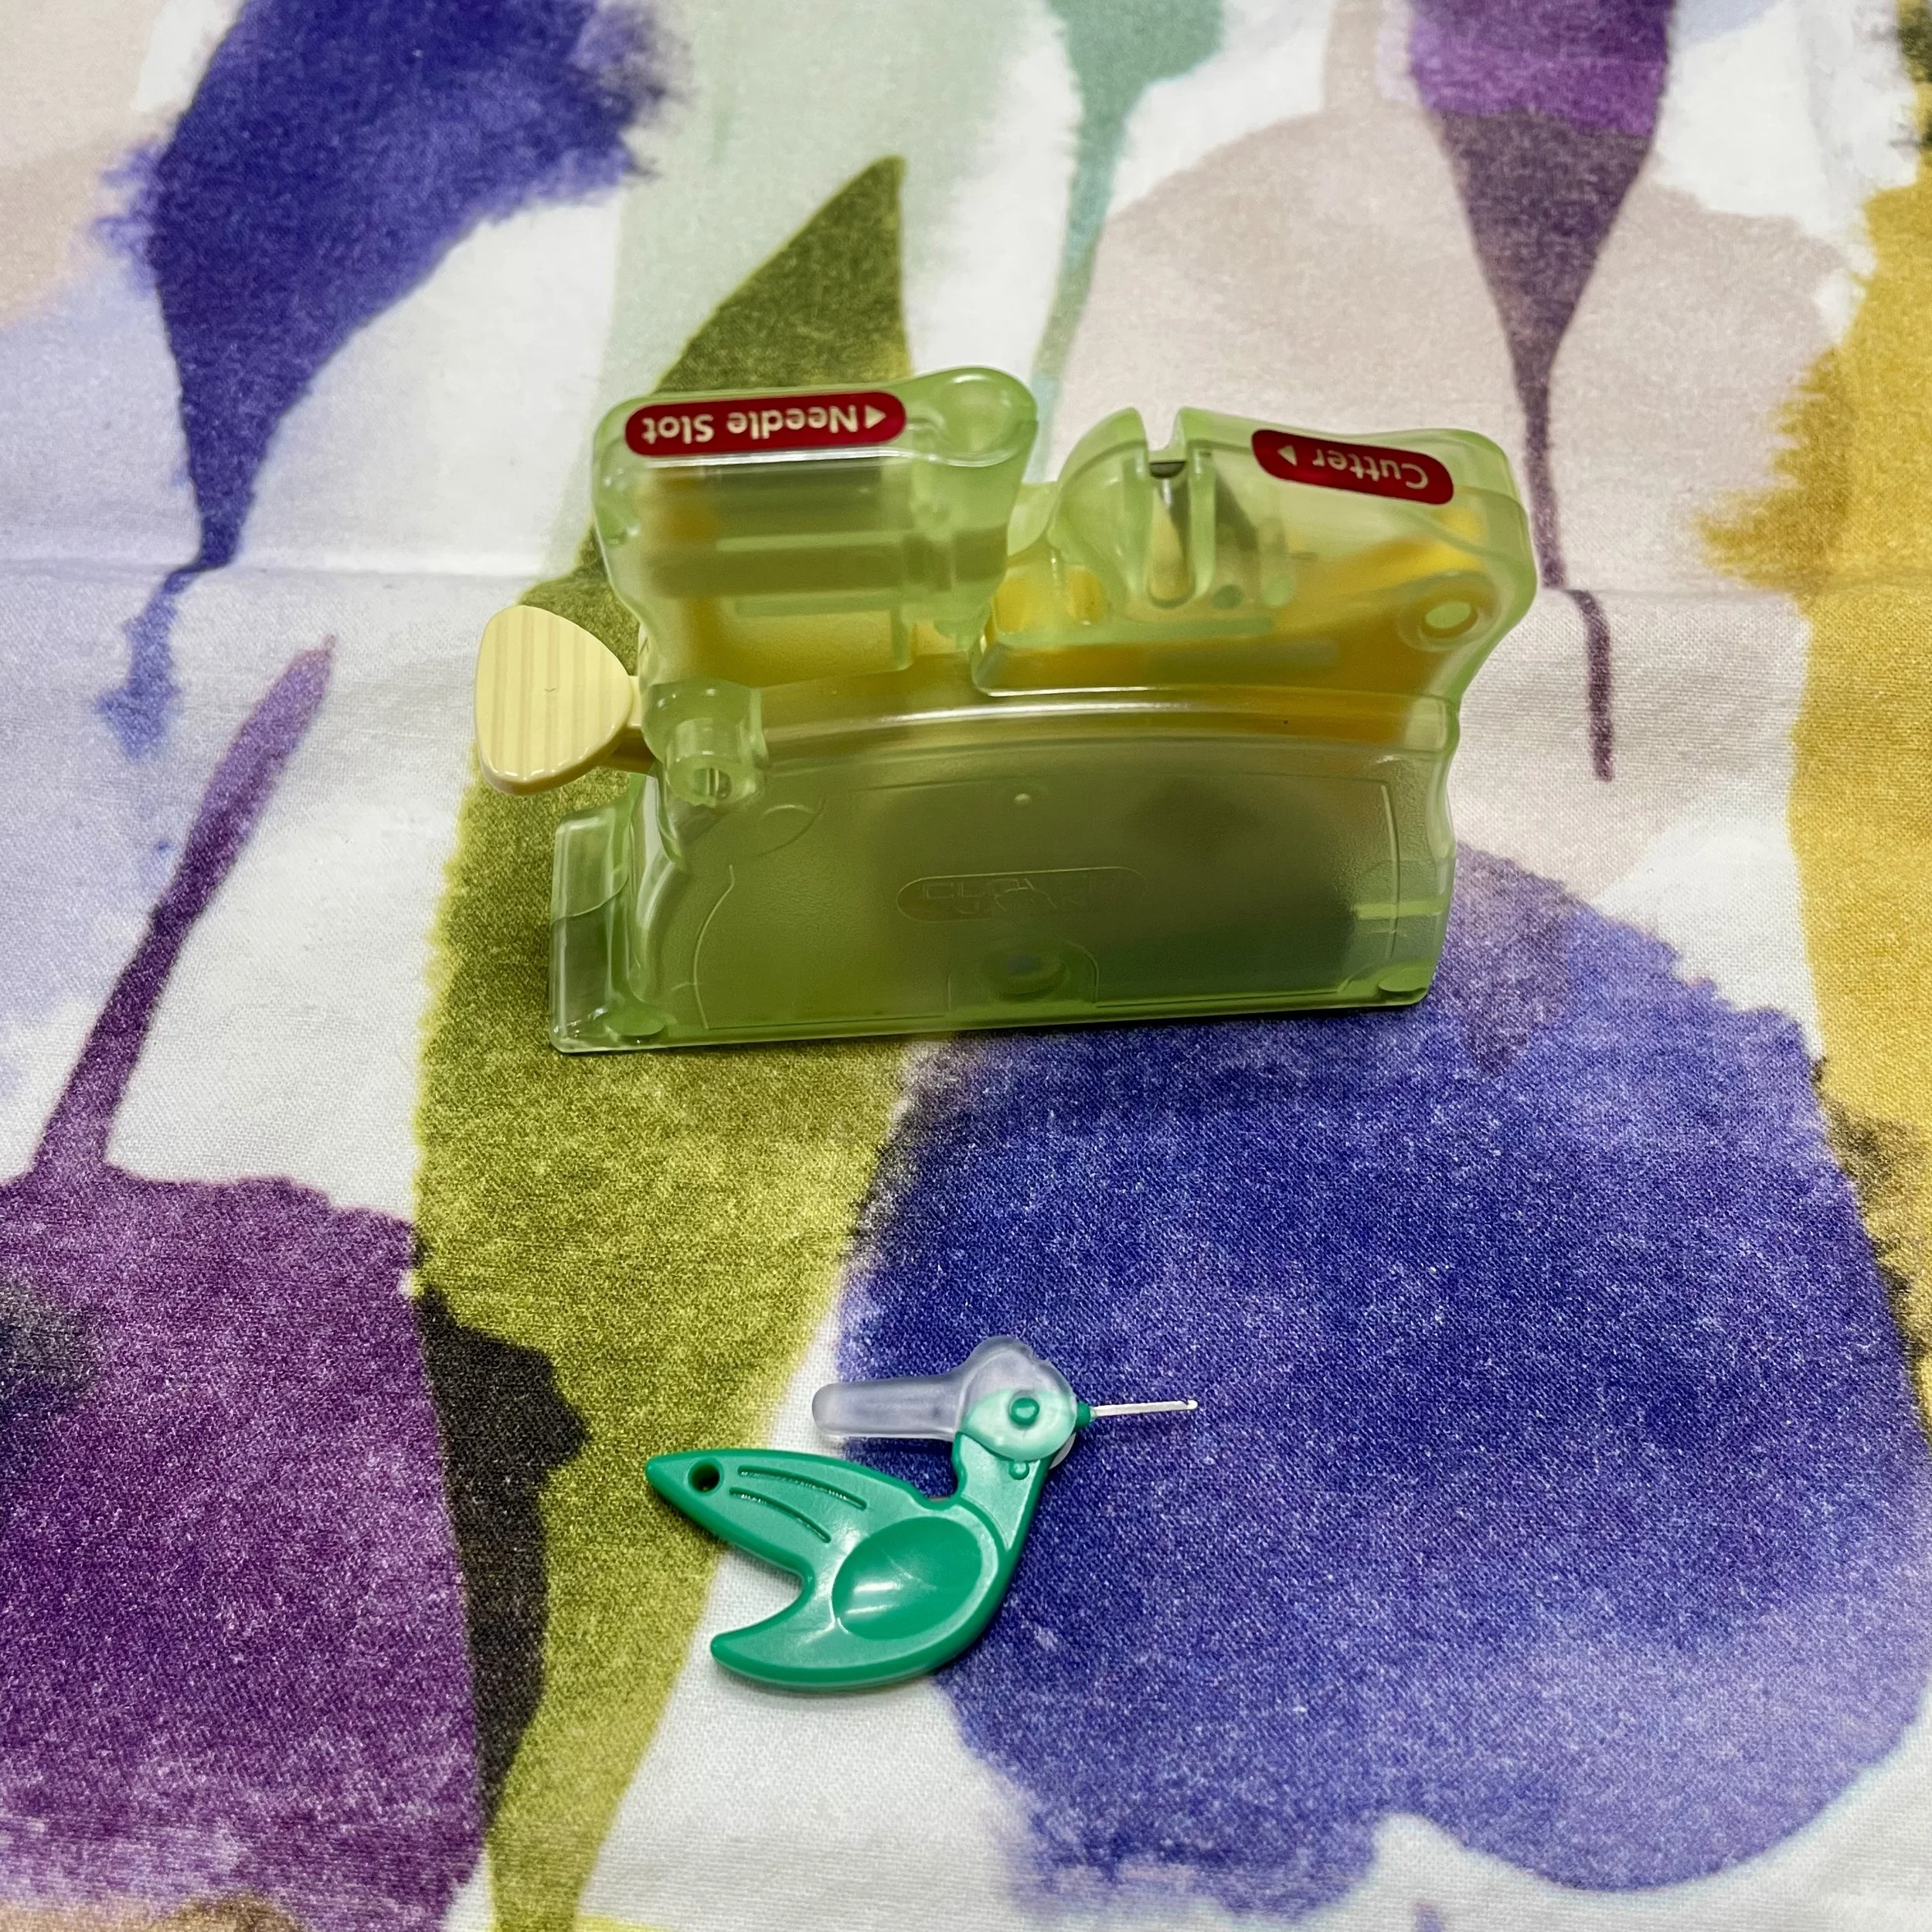
Clover desk needle threader and Dritz hummingbird micro-threader
If you’re working with Japanese needles, or even a finer European needle, I would recommend investing in a needle threader. The most economical option, and one that will work regardless of needle size, is a filament threader. I used these until they broke from overuse. If you’re making yubinuki in a greater volume, you could use a micro threader, which is sturdier, but can sometimes catch and split the thread. I ultimately wound up with a desktop threader, which is the largest and most expensive option (about $15-20 USD), but also the sturdiest and least likely to break when you’re making as many yubinuki as I do.
You may also want a pincushion or a magnetic needle rest so you don’t lose your needle and/or accidentally stab yourself when you need to put it down. (Though there is a possibility that’s just a me problem. I don’t think most people are likely to repeatedly impale their forearm on a sewing needle.)
Finally, unless you have access to a program like Affinity Designer or Adobe Illustrator, or are particularly fond of math and own an extremely precise ruler, you’re probably going to want a koma guide for dividing your yubinuki into the required number of segments for your project. You can download a free PDF with guides for the most commonly used koma numbers sized for standard yubinuki (fits on a US size 8 mandrel) right here.
If you want the full range of koma guides, or are looking for a different size, you can purchase the PDFs from my webstore. I will probably post a tutorial at some point in the future for anyone who owns one of the aforementioned programs and wants to make their own.
And that’s it! If you have any questions, or need advice on something I didn’t cover, let me know in the comments. ガンバ!